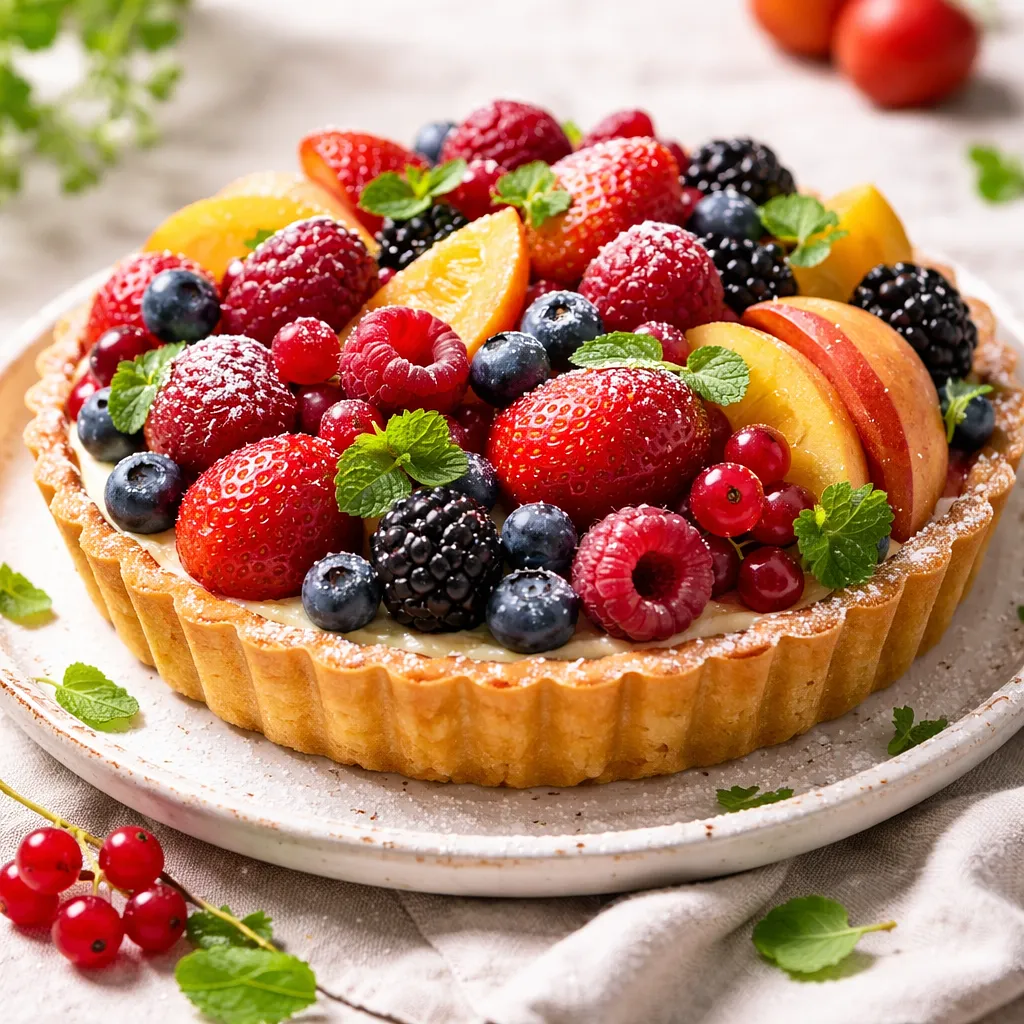
A delicate tart with a crumbly, buttery base and a thick pastry cream, decorated with fresh seasonal fruits: strawberries, raspberries, blueberries, and kiwi. This elegant and impressive dessert is perfect for Valentine's Day — it combines the sweet and sour notes of the fruits with the velvety cream and crunchy tart. It looks very decorative (you can arrange the fruits in the shape of a heart), and thanks to simple ingredients, it allows you to achieve a professional effect. Serve chilled, preferably with a cup of espresso or a glass of sparkling wine; it works great as a dessert for a romantic dinner. Qualities: creamy texture, distinct buttery flavor of the pastry, and freshness of the fruits, impressive, colorful appearance.
Prepare all the ingredients and tools: a 24 cm tart pan with a removable bottom, a large bowl, a mixer with a whisk or a hand whisk, a knife, a cutting board, a rolling pin, baking paper, beans or weights for blind baking, a saucepan, a whisk or spoon, plastic wrap. Take the butter out of the fridge a moment before using (it should be cold, not softened). Preheat the oven to 180°C (top-bottom) without turning on the grill, but only before baking the tart.
Use a 24 cm tart pan – this is the standard size that fits the given amounts. If you have a stand mixer, use the dough hook; you can also knead by hand.
Shortcrust pastry
2
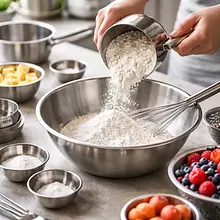
In a large bowl, sift in the flour (250 g) and add the powdered sugar (60 g) and salt (2 g). Mix the dry ingredients with a wooden spoon. Cut the chilled butter (185 g) into small cubes and add it to the flour. Rub the butter with your fingers or use a pastry cutter in a mixer (short pulses) until the mixture resembles coarse crumbs (the size of a pea). Then, crack in 1 egg (using from a total of 3 eggs; if using separate eggs, weigh them accurately), and add a teaspoon of vanilla extract (5 g). Quickly knead the dough — combine the ingredients with your hands just until the mixture starts to form a crumbly but cohesive piece; do not knead for long (max 1-2 minutes by hand). Gather the dough into a ball, slightly flatten it, wrap it in plastic wrap, and chill in the refrigerator for at least 1 hour.
Use a knife to cut the butter into cubes and a spatula for quick mixing. Do not knead too long — overheating the butter will cause the dough to be hard after baking. The dough is ready to chill when it holds its shape after being squeezed, but is not hard.
Shaping the base
3
Remove the dough from the fridge after at least 1 hour. Sprinkle the countertop with a little flour and roll out the dough to a thickness of 3–4 mm. To achieve an even thickness, rotate the dough every few rolls of the rolling pin. Roll the dough onto the rolling pin and transfer it to the tart pan. Gently press it into the bottom and sides of the pan, ensuring there are no air bubbles — press with your fingers, but do not stretch the dough over the edges. Trim the excess dough by holding the knife blade parallel to the edge of the pan. Prick the bottom densely with a fork to allow steam to escape.
Ingredients:
Wheat flour, Butter, Egg
It's best to use a tart pan with a removable bottom — it makes it easier to take out the finished tart. If the dough tears, pinch it together with your fingers and chill for 10 minutes before continuing.
Baking (blind baking)
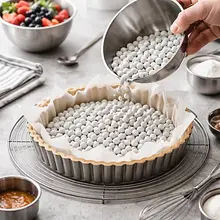
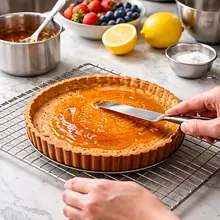
4
Line the bottom of the pastry with parchment paper and fill it with weights (e.g. ceramic baking balls, dry beans). Place in the preheated oven (180°C) and bake for 15 minutes. After 15 minutes, remove the tart from the oven, carefully remove the paper with the weights (be careful, as the beans will be hot) and continue baking for another 8–12 minutes, until the bottom is dry and the edges are nicely golden. After baking, remove the pan and let it cool on a kitchen rack for 10–15 minutes.
Ingredients:
Wheat flour, Butter, Egg
Use parchment paper and weights; if you don't have weights, do the same with dry beans. Bake first with the weights to prevent the sides from collapsing. The bottom is ready when it is not raw and has a light golden color.
Pastry cream
5
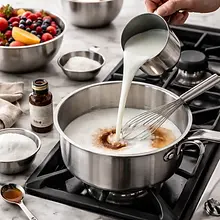
Pour the milk (500 ml) into a saucepan and heat it together with half of the sugar (47.5 g from 95 g) and vanilla extract (you can add seeds from a vanilla pod) until steam starts to rise and small bubbles appear at the edges (do not bring to a boil) — temperature about 80°C. In a bowl, mix the remaining sugar (47.5 g) with the egg yolks (use 2 eggs from a total of 3 eggs = 120 g if you want to be precise, but due to one item 'egg' in the ingredients: separate 2 eggs 120 g) and cornstarch (30 g), whisking until smooth and lump-free. Slowly pour 1/3 of the hot milk into the egg mixture, stirring continuously (tempering) — this will prevent the eggs from curdling. Then pour the entire mixture back into the saucepan with the rest of the milk and cook over medium heat, stirring vigorously, until the cream thickens and starts to bubble (2–3 minutes from the moment it boils). The finished cream should be thick, silky, and have no raw flour taste. Remove from heat, add a tablespoon of butter from the total amount (in total, butter already used in the dough; if you want to add more, use about 10–15 g) and stir until melted. Pour the cream into a clean bowl, cover the surface with plastic wrap (pressing the wrap directly against the cream to prevent a skin from forming) and set aside to cool to room temperature, then chill in the refrigerator to about 30–40°C before serving.
Ingredients:
Milk, White sugar, Cornstarch, Egg, Vanilla extract, Butter
Use a heavy-bottomed saucepan to avoid burning the cream. Tempering the eggs is crucial — if you pour in the hot milk right away, the eggs will curdle (you'll see lumps). The cream is ready when it thickens and holds its shape after you remove the spoon.
Preparing the fruits
6
Wash the fruits just before use. Remove the stems from the strawberries (300 g) and slice them or cut them in half if they are large. Peel the kiwi (150 g) and cut it into thin slices. Gently dry the raspberries (150 g) and blueberries (100 g) with a paper towel. You can briefly macerate the strawberries: place the strawberries in a bowl, add lemon juice (10 g) and 15 g of sugar (measured from white sugar), gently mix and let sit for 8–10 minutes — the fruits will release juice and will have a more intense flavor. After maceration, drain the excess juice into a separate bowl (you can use it later to dilute the jam for glazing).
Ingredients:
Strawberries, Kiwi, Raspberries, Blueberries, Lemon juice, White sugar
Do not wash the raspberries and blueberries too vigorously — they can easily get crushed. Macerating the strawberries enhances the flavor, but do not do it for too long, as the fruits will fall apart.
Glaze
7
If you are using apricot jam (60 g, optional), heat it in a small saucepan with 1–2 tablespoons of water (10–20 g) for 1–2 minutes, strain through a sieve to remove fruit pieces and achieve a smooth glaze. Pour into a small bowl and set aside to cool slightly. If you are not using jam, you can gently brush the fruit with a thin layer of syrup from the macerated strawberries.
Use a fine sieve to achieve a perfectly smooth glaze. Apply the glaze with a brush when it is slightly warm — too hot will melt the cream, too cold will be thick and difficult to spread.
Assembly and decoration
8
On the cooled tart base (make sure it is completely cooled), optionally sprinkle a thin layer of ground almonds (30 g) — this will prevent the base from soaking up the cream and add flavor. Evenly spread the pastry cream (cold but pliable) — use a spoon or spatula, spreading the cream to the edges. Start arranging the fruits: you can make circles (on the outside: slices of strawberries, then kiwi, fill the center with raspberries and blueberries) or arrange the fruits in the shape of a heart for Valentine's Day. After arranging, gently brush the fruits with the prepared glaze (if using jam) to give them shine and protect them from drying out.
Use a flat spoon or spatula to spread the cream, and a small knife for arranging the fruit. If you are adding almonds, evenly sprinkle a thin layer before the cream.
Cooling and serving
9
After glazing, chill the tart in the refrigerator for at least 1 hour to allow the cream to set and the flavors to meld. Before serving, remove the tart from the pan — if you are using a tart pan with a removable bottom, gently separate the sides with a knife and lift the bottom. Cut the tart into 8 equal pieces with a sharp knife.
Ingredients:
Strawberries, Raspberries, Blueberries, Kiwi, Apricot jam
Cooling is important: the cream should be cold so that cutting does not smear the decorations. Use a hardened, sharp knife dipped in hot water and dried before each cut for clean slices.
Final tips
10
Serve the tart chilled; you can add fresh mint leaves for decoration (optional, not included in the ingredients). If you want to prepare the tart in advance, bake the crust and make the cream the day before, store them separately in the fridge, and assemble with the fruit on the day of serving.
Ingredients:
Wheat flour, Milk, Egg, Strawberries
If you want to prepare the dessert in advance: the baked base can be stored in an airtight container for up to 2 days, and the cream for 2 days in the refrigerator. It's best to add the fruit just before serving.
Fun Fact
💡
Tarts originate from French cuisine; the classic fruit tart (tarte aux fruits) has been popular since the 19th century. Arranging fruits in aesthetic patterns is a pastry tradition that highlights the seasonality and color of the ingredients.
Serve the tart chilled, on its own or with a light whipped cream, a scoop of vanilla ice cream, or espresso. For an elegant effect on Valentine's Day, arrange the fruits in the shape of a heart. Cutting with a knife dipped in hot water gives even slices.
🥡Storage
Store the tart in the refrigerator in an airtight container for up to 48 hours. Do not freeze the finished fruit tart (the fruit will lose its texture). If you only have the baked crust and cream, you can freeze them separately (crust for up to 1 month, cream not recommended for freezing). It is best to prepare the glaze just before serving.
Valentine's Day is a special occasion when love and romance intertwine in culinary delights. It's a time when couples celebrate their feelings, often around a shared table. Traditionally, on this day, dishes are prepared that not only please the palate but also create a magical atmosphere. A red ...
Desserts are a sweet ending to a meal that brings joy to both children and adults. In this category, we present recipes for a variety of sweets - from simple creams and mousses, to elegant panna cottas, and exquisite fruit tarts. Our desserts include both classics of Polish cuisine - fruit jelly,...


Comments (0)
Be the first to comment on this recipe!
Add a comment