Lemon tart with Italian meringue and a hint of thyme

Cakes and Bakes Desserts Dishes for Special Occasions 120 min Medium 11 wyświetleń ~18.04 PLN - (0)
Rate:
(0)
Start Cooking

Description

This tart is the essence of elegance and refined taste, where every element plays a key role. We start with the absolute foundation, often overlooked but so essential – washing the fruits. This step ensures that the flavor of our tart is pure, intense, and free from the chemical aftertaste of preservatives. On a perfectly crumbly, buttery base, enriched with a subtle herbal note of fresh thyme, rests a velvety, intensely lemony cream (lemon curd). Its flavor is a perfect balance between sweetness and refreshing acidity. The whole is crowned with a cloud of fluffy, stable, and shiny Italian meringue, which is cooked with hot sugar syrup and then gently toasted, giving it a beautiful color and a slightly caramel aroma. This is a dessert that delights not only with its taste but also with its appearance – the contrast of the shiny white meringue, sunny yellow cream, and golden base creates a small work of art. Perfect for special occasions when you want to impress your guests with a dessert made from the heart and with attention to every detail.

Ingredients (11)

Servings:
8
  • Mąka pszenna tortowa typ 450 250 g
  • Butter 205 g
  • Powdered sugar 50 g
  • Żółtko jaja kurzego 3 szt.
  • Cytryny 3.2 szt.
  • Chicken eggs 3 szt.
  • Cukier drobny do wypieków 23.3 łyżki
  • Egg white 2.6 szt.
  • Water 50 ml
  • 🌿 Przyprawy
  • Salt 0.0 szczypt
  • ✨ Opcjonalne
  • Fresh thyme 0.0 pęczków
💰 Szacowany koszt dania: ~18.04 PLN (2.25 PLN/porcję)

💡 Kliknij na składnik aby oznaczyć jako użyty

Preparation steps

Washing and preparing lemons

1

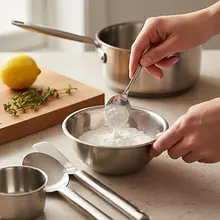
This is the most important step for a pure taste. Prepare a paste from 2 tablespoons of baking soda and a little water. Scrub each lemon thoroughly with this paste using a soft vegetable brush. Then rinse the lemons under running water and blanch them by pouring boiling water over them in a bowl for about 1 minute. Rinse again under cold water and dry thoroughly with a paper towel. This process removes wax, pesticides, and other impurities from the skin.

Ingredients: Cytryny
Never skip this step, especially when using the peel! Use a glass or metal bowl for blanching. The brush should be clean and designated only for vegetables. Thorough drying is important before grating the peel.

Thyme Shortcrust Pastry

2

In a large bowl, sift the all-purpose flour and powdered sugar. Add a pinch of salt. Take the very cold butter (125g) out of the fridge, cut it into small cubes (about 1x1 cm), and add it to the flour. Using a knife or a special pastry cutter, vigorously chop the butter with the flour until the mixture resembles wet sand or coarse crumbs. The goal is to warm the butter as little as possible with your hands.

Ingredients: Mąka pszenna tortowa typ 450, Butter, Powdered sugar, Salt
You can also use a food processor with an 'S' blade – pulse the ingredients for a few seconds. The key is the speed and the low temperature of the butter. The colder the butter, the flakier the dough.
3

Add one egg yolk (20g) and, if using, chopped fresh thyme leaves. Now quickly knead the dough with your hands, just until the ingredients come together into a uniform ball. Do not knead for too long! The longer you knead, the more gluten develops, and the dough will be hard instead of crumbly after baking. Flatten the finished dough into a disk and wrap it in plastic wrap.

Ingredients: Żółtko jaja kurzego, Fresh thyme
Kneading should last a maximum of 30-60 seconds. If the dough is too dry and won't come together, add 1 teaspoon of ice-cold water. Flattening the dough into a disk will make rolling it out easier later.
4

Place the dough wrapped in foil in the refrigerator for at least 30 minutes, preferably for an hour. Chilling the dough is absolutely crucial. It allows the butter to firm up again, which prevents the dough from shrinking during baking and ensures its perfect flakiness.

Do not shorten the cooling time! You can prepare the cake a day in advance and store it in the fridge.
5

Preheat the oven to 190°C (fan). Take the dough out of the fridge. On a lightly floured surface, roll it out into a circle larger than the tart pan (about 28 cm) and about 3-4 mm thick. Carefully transfer the dough to the tart pan (24 cm in diameter, preferably with a removable bottom), by rolling it onto the rolling pin. Firmly press the dough into the bottom and sides of the pan, using your fingers. Trim any excess dough with a knife or by rolling a pin along the edge of the pan. Prick the bottom densely with a fork.

Use a metal tart pan with a removable bottom – this will make it much easier to remove the finished pastry. Pricking the bottom prevents it from puffing up during baking.
6

Place a piece of parchment paper in the cake pan, and pour weights on top – special ceramic balls, dry beans, or peas. The weights will prevent the edges from sliding down and the bottom from puffing up. Put the pan in the preheated oven and bake for 15 minutes.

This technique is known as 'blind baking,' which ensures that the crust will be fully baked and crispy, even after adding a wet cream. The paper must be larger than the pan to easily remove it with the weight.
7

After 15 minutes, carefully remove the pan from the oven. Grabbing the edges of the parchment paper, lift it out along with the weights. Place the tart back in the oven and bake for another 10-15 minutes, until the bottom is dry and lightly golden. Remove from the oven and let it cool completely on a wire rack.

The base must be completely cooled before applying the cream, otherwise it will become soggy. Do not pour hot cream onto a hot base!

Lemon Curd

8

Grate the zest from 3 previously washed lemons using a fine grater (only the yellow part, the white part is bitter). Squeeze the juice from all 4 lemons – you should get about 150 ml of juice. In a metal or glass bowl, place 3 whole eggs and 2 additional yolks. Add 150g of fine sugar. Set aside the separated egg whites (a total of 3) in a separate, ideally clean bowl – they will be needed for the meringue.

Ingredients: Cytryny, Chicken eggs, Żółtko jaja kurzego, Cukier drobny do wypieków, Egg white
Make sure that the bowl you set the egg whites in is absolutely clean and dry, with no trace of grease. This is crucial for whipping the meringue later.
9

Using a whisk, thoroughly mix the eggs, egg yolks, and sugar in a bowl until the ingredients are combined and the mixture becomes smooth and slightly fluffy. You don't need to beat them into a foam; just mix vigorously for about a minute. Then add the grated zest and squeezed juice from the lemons. Mix again.

Use a whisk, not a mixer. We just want to combine the ingredients, not aerate them. Mixing the sugar with the eggs at the beginning prevents lumps from forming.
10

Prepare a water bath. Pour water into a pot to a height of about 3-4 cm and bring to a boil. Reduce the heat so that the water is just gently simmering. Place a bowl with the egg-lemon mixture on top of the pot (the bottom of the bowl should not touch the water). While constantly whisking, heat the mixture for about 8-10 minutes, until it thickens noticeably and has a pudding-like consistency. The finished cream should coat the back of a spoon.

Continuous stirring is key to prevent the eggs from curdling and turning into scrambled eggs. The water bath provides gentle, even heating. Be patient, the thickening process occurs towards the end.
11

Remove the bowl from the pot. Cut the cold butter (80g) into cubes and add it in batches to the hot cream, stirring constantly until the butter is completely melted and combined with the mixture. Adding cold butter at the end will give the cream a velvety smoothness and shine.

Ingredients: Butter
Add the butter gradually, mixing after each portion. This will help create a stable emulsion and prevent the cream from separating.
12

To remove any potential lumps and lemon zest, strain the still hot cream through a fine mesh sieve into a clean bowl. Cover the surface of the cream with plastic wrap so that it touches the surface – this will prevent a skin from forming. Set aside to cool completely, then refrigerate for at least an hour to set.

Straining is optional, but highly recommended for achieving a perfectly smooth texture. The contact of the foil with the surface of the cream is a professional trick that always works.

Italian Meringue

13

In the bowl of a mixer, place the 3 reserved egg whites. Make sure the bowl and the whisk attachment are perfectly clean and degreased (you can wipe them with a cotton pad soaked in vinegar or lemon juice). Start beating the egg whites on low speed. When they start to foam, increase the speed to medium and beat until a thick, white foam forms, but not yet completely stiff (the so-called 'soft peaks').

Ingredients: Egg white
Use a stand mixer, as you will need your hands free to pour in the hot syrup. Room temperature egg whites whip faster and to a greater volume.
14

Meanwhile, while the egg whites are being whipped, place 200g of fine sugar and 50ml of water in a small saucepan with a thick bottom. Heat over medium heat, stirring only until the sugar dissolves. Then stop stirring and cook the syrup until it reaches a temperature of 118-121°C (the 'soft ball' stage). If you don't have a thermometer, after about 5-7 minutes of cooking, dip a teaspoon into the syrup and then into cold water – a soft ball should be able to be formed from the syrup.

Ingredients: Cukier drobny do wypieków, Water
Be sure to use a candy thermometer for precision! Overheating the syrup will make the meringue hard, while undercooking it will make it unstable and runny. Use a brush dipped in water to wipe the sides of the pot to remove any sugar crystals that could cause the entire syrup to crystallize.
15

When the syrup reaches the right temperature and the egg whites are whipped to a thick foam, reduce the mixer speed to the minimum. Very slowly, in a thin stream, pour the hot syrup into the whipped egg whites, aiming for the space between the mixer attachment and the bowl's wall. Be careful not to let the syrup hit the whisk directly, as it will splatter around the bowl and harden.

This is the most critical moment. The syrup must be poured slowly and continuously. The hot syrup 'cooks' the proteins, pasteurizing them and creating a very stable meringue. Do not pour the syrup all at once!
16

When you pour in the entire syrup, immediately increase the mixer speed to maximum and beat the meringue continuously for the next 8-10 minutes. The meringue is ready when the mixing bowl feels completely cold to the touch, and the meringue itself is thick, glossy, and forms stiff, sharp peaks.

Do not stop whipping until the meringue cools down. This is crucial for its stability. The finished Italian meringue is incredibly smooth, glossy, and durable – it won't collapse like French meringue.

Assembly and finalization of the tart

17

Take the chilled lemon cream out of the fridge. Transfer it onto the completely cooled shortcrust base and spread it evenly using a spatula or spoon.

Make sure that both the base and the cream are cold. This will prevent the dough from softening and ensure perfect layers.
18

On top of the cream, spread the prepared Italian meringue. You can do this with a spoon, creating artistic, irregular patterns and 'waves', or use a piping bag with a decorative tip (e.g., star-shaped) to create more regular rosettes.

Work with the meringue immediately after preparation. The longer it sits, the harder it will be to shape. Creating high peaks and dips will give a more interesting visual effect after toasting.
19

Using a kitchen torch, caramelize the meringue, moving the flame a few centimeters away from its surface until the peaks turn a beautiful golden-brown color. If you don't have a torch, place the tart in an oven preheated to 220°C with the grill function on (heating from above) for 1-2 minutes, keeping a close eye to ensure the meringue doesn't burn.

A torch provides the greatest control and the best effect. When using an oven, be very vigilant – the meringue can burn in just a few seconds! Caramelizing not only adds color but also a wonderful, slightly caramelized flavor.

Fun Fact

💡

Italian meringue, unlike French meringue (raw egg whites whipped with sugar), is considered the most stable of all meringues. By cooking the egg whites with hot sugar syrup, it is not only safe to eat without baking, but it also does not collapse and holds its shape beautifully, making it ideal for decorating cakes and tarts.

Best for

Tips

🍽️ Serving

Serve the tart chilled, but take it out of the fridge about 15-20 minutes before serving to allow the flavors to fully develop. Use a long, sharp knife dipped in boiling water and dried before each cut for perfectly even and clean slices. You can decorate with fresh thyme leaves or a bit of grated lime zest for a color contrast.

🥡 Storage

The tart is best eaten on the day it is made, as it is the tastiest then and the crust is the crispiest. It can be stored in the refrigerator in an airtight container for up to 2 days. However, it should be noted that the next day the meringue may start to 'weep' (release droplets of syrup), and the crust may soften slightly from the moisture of the cream.

📸 Ugotowane przez społeczność

Zaloguj się, aby dodać zdjęcie
Dodaj zdjęcie gotowej potrawy

Po zatwierdzeniu przez moderatora otrzymasz 10 punktów doświadczenia.

🍲

Nikt jeszcze nie dodał zdjęcia. Bądź pierwszy!

Comments (0)

Be the first to comment on this recipe!

Add a comment

You might also like

Recipe Categories

Homemade cakes and pastries are the heart of Polish culinary tradition - sweet memories from childhood. In our collection, you will find recipes for classic yeast cakes, shortcrust, sponge, and cheesecake. Apple pie, poppy seed cake, gingerbread, Easter babka, chocolate cake, and New York cheesec...

See all recipes in this category
Desserts
Desserts in: New Year's Eve

A sweet ending to the New Year's Eve dinner is a must-have that will put everyone in a joyful mood for the new year.

See all recipes in this category

Dishes for special occasions are culinary masterpieces for birthdays, anniversaries, and holidays. Grilled beef steak with herb butter - restaurant quality at home. Beef Wellington - beef in puff pastry with duxelles. Roast duck with apples - a holiday tradition in a new edition. Pink salmon with...

See all recipes in this category
Reklama