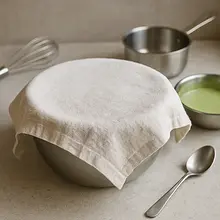
Prepare the dry ingredients. In a large bowl, place a fine-mesh sieve. Sift through it the all-purpose flour, 10g (two teaspoons) of matcha powder, powdered sugar, and baking powder. Add two pinches of salt. Then mix everything thoroughly using a whisk. This step is crucial to aerate the ingredients and eliminate lumps, especially from the matcha, which will ensure a smooth batter and a uniform color for the waffles.
Description
Here’s a recipe that will take a classic breakfast to a whole new level of flavor and aesthetics. Matcha Waffles are a refined variation of traditional Belgian waffles, enriched with the subtle, slightly earthy, and incredibly aromatic taste of Japanese green tea matcha. The batter is fluffy on the inside while perfectly crispy on the outside, with a beautiful pale green color. The whole dish is complemented by a velvety, sweet white chocolate glaze, also tinted with matcha, creating a stunning, intensely green accent. This dish is not only a feast for the palate but also for the eyes. Served with crunchy, chopped pistachios and fresh raspberries, they create a perfect composition for special occasions, lazy weekend mornings, or an elegant dessert. It’s a suggestion for those who appreciate unconventional combinations and want to surprise their guests with something extraordinary.
Ingredients (13)
- Mąka pszenna tortowa (typ 450) 250 g
- Powdered sugar 50 g
- Baking powder 10 g
- Chicken egg (size L) 2 szt.
- Milk 3.2% 300 ml
- Masło 82% 80 g
- Vanilla extract 5 g
- White chocolate 150 g
- 30% heavy cream 50 ml
- 🌿 Przyprawy
- Matcha (ceremonial powder) 3 łyżeczki
- Salt 0.1 szczypt
- ✨ Opcjonalne
- Shelled, unsalted pistachios 30 g
- Fresh raspberries 125 g
💡 Kliknij na składnik aby oznaczyć jako użyty
Preparation steps
Waffle batter
In a separate medium bowl, prepare the wet ingredients. Crack two eggs and whisk them vigorously with a fork or whisk for about 30 seconds, until the whites and yolks are well combined. Then pour in the milk and vanilla extract, and mix everything again until you achieve a smooth, liquid mixture.
Combine the dry ingredients with the wet ones. Make a well in the center of the mixture of dry ingredients, resembling a volcano crater. Pour all the contents of the bowl with wet ingredients into this well. Using a whisk or a wooden spoon, gently mix from the center outwards until the ingredients are just combined. Don't worry if small lumps remain – it's better than overmixing the batter.
Add melted butter. In a small saucepan or in the microwave, melt the butter and set it aside for a moment to cool slightly (it should not be hot). Then, slowly pour it into the bowl with the batter while gently mixing until the butter is incorporated into the mixture. The batter should be smooth and have the consistency of thick cream.
Set the dough aside to rest. Cover the bowl with the dough with a clean kitchen towel or plastic wrap and leave it on the kitchen counter for at least 20 minutes. This time will allow the gluten in the flour to relax and the baking powder to start working, which will make the waffles incredibly fluffy and tender.
Preheat the waffle maker according to the manufacturer's instructions. Once it's hot, brush the heating plates with a little oil or butter using a silicone brush. Pour a portion of the batter into the center of the bottom plate (about 1/2 to 2/3 cup, depending on the size of the waffle maker). Close the lid and bake for 3-5 minutes. The waffles are ready when the steam stops rising vigorously, and the waffle is golden-brown and crispy. Carefully remove the finished waffles using a wooden stick or silicone spatula and place them on a cooling rack.
Glaze and serving
Prepare the white chocolate ganache. Break the chocolate into small pieces and place it in a heatproof bowl. In a small saucepan, heat the heavy cream until hot, but do not bring it to a boil. Pour the hot cream over the chocolate and let it sit for 2-3 minutes without stirring. After that time, begin to gently stir with a spatula from the center until all the chocolate is melted and a smooth, glossy emulsion (ganache) forms.
Add the matcha to the glaze. Sift the remaining 5g (one teaspoon) of matcha through a small sieve directly into the bowl with the melted white chocolate. Using a small whisk, mix vigorously until the powder is completely dissolved and the glaze achieves a uniform, intense green color. If the glaze is too thick, you can add a little more warm cream.
Serve the waffles. Place two warm waffles on a plate, one on top of the other, slightly offset. Generously drizzle them with the prepared green sauce, allowing it to flow freely down the sides. If you are using optional ingredients, sprinkle everything with coarsely chopped pistachios for crunch and decorate with fresh raspberries for color and a tangy touch. Serve immediately.
Fun Fact
Matcha, used in this recipe, has its roots in the Chinese Tang dynasty, but it was Japanese Zen monks who refined its cultivation and drinking, making it a central element of the tea ceremony 'chanoyu'. Unlike regular tea, when drinking matcha, we consume the whole leaf, which provides the body with significantly more antioxidants and nutrients.
Best for
Tips
Serve the waffles immediately after baking to maintain their perfect crispiness. They pair wonderfully with a scoop of vanilla or coconut ice cream, which will add creaminess and a pleasant temperature contrast. You can also serve them with a dollop of whipped cream or Greek yogurt to balance the sweetness of the topping.
If you have leftover waffles, store them in an airtight container at room temperature for up to 2 days. Do not store them with the topping. To regain their crispiness, reheat them in a toaster, oven (about 5 minutes at 180°C), or on a dry skillet. Avoid reheating in the microwave, as they will become soft and rubbery. Store the topping in the refrigerator in a closed jar for up to 3 days; before use, gently warm it in a water bath.
📸 Ugotowane przez społeczność
Zaloguj się, aby dodać zdjęcieDodaj zdjęcie gotowej potrawy
Po zatwierdzeniu przez moderatora otrzymasz 10 punktów doświadczenia.
Nikt jeszcze nie dodał zdjęcia. Bądź pierwszy!
Comments (0)
Be the first to comment on this recipe!
Add a comment