Creative Casserole 'Clean Fridge'

Pikantne Main Dishes Lunches European cuisine 45 min Easy 17 wyświetleń ~10.51 PLN - (0)
Rate:
(0)
Start Cooking

Description

This is not just an ordinary recipe, but rather a culinary philosophy of wise cooking and food waste reduction, dressed in the form of a delicious and hearty casserole. This dish is a tribute to all the leftovers in the fridge – yesterday's roasted chicken, a few boiled potatoes, a lonely carrot, or the end of a cheese. Thanks to the magical combination in a creamy egg and cheese sauce, these seemingly mismatched ingredients transform into a cohesive, aromatic, and incredibly appetizing dish. The 'Clean Fridge' casserole is the essence of home warmth and thriftiness. Its flavor is different every time, unique, dictated by the contents of our fridge. Visually, it presents beautifully – a golden, crispy cheese crust hides a wealth of colors and textures beneath. It’s the perfect solution for a quick dinner in the middle of the week when time and ideas are lacking. Serve it with a simple salad to create a wholesome and balanced meal for the whole family.

Ingredients (13)

Servings:
4
  • Chicken eggs 4 szt.
  • 18% cream 200 ml
  • Yellow cheese (e.g. gouda, cheddar) 150 g
  • Onion 1 szt.
  • Garlic 2 ząbki
  • Rapeseed oil 30 g
  • Carbohydrate base from leftovers 500 g
  • Protein base from leftovers 300 g
  • Vegetable broth from scraps 300 g
  • 🌿 Przyprawy
  • Salt 0.2 szczypt
  • Ground black pepper 2 szczypty
  • ✨ Opcjonalne
  • Chives 0.2 pęczków
  • Dijon mustard 10 g
💰 Szacowany koszt dania: ~10.51 PLN (2.63 PLN/porcję)

💡 Kliknij na składnik aby oznaczyć jako użyty

Preparation steps

Preparation of the flavor base

1

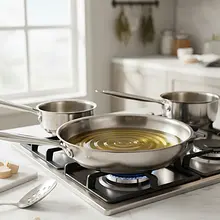
Start by preparing the aromatic base. Peel the onion from the outer, dry skins, cut it in half and place the flat side on the cutting board. Chop it into small cubes. Place the garlic cloves on the board and crush them with the flat side of the knife - this will make it easier to remove the skin. Then chop it very finely.

Ingredients: Onion, Garlic
Use a sharp chef's knife, it will make chopping much easier and faster. A stable cutting board is essential for safety. Remember, the finer you chop the ingredients, the better they will distribute their flavor throughout the casserole.
2

In a large skillet (about 28 cm in diameter), heat the rapeseed oil over medium heat. To check if it's ready, toss in a small piece of onion - it should start to sizzle. Add the chopped onion and sauté for about 5-6 minutes, stirring occasionally with a wooden spoon, until it becomes soft and translucent (it will become glazed). In the last minute of cooking, add the minced garlic and sauté until it releases its aroma. Be careful not to burn it, as it will become bitter.

Ingredients: Rapeseed oil, Onion, Garlic
The best option is a pan with a thick bottom that evenly distributes heat. Do not set the burner too high so that the onion does not burn, but caramelizes slowly, releasing its natural sweetness.

Preparation of the egg and cheese mixture

3

In a large bowl, prepare a mixture that will combine all the ingredients. Crack the eggs into it. Using a whisk or fork, vigorously beat them for about a minute until the whites and yolks are completely combined, creating a uniform, slightly frothy mixture.

Ingredients: Chicken eggs
Using a large bowl will make it easier to mix all the ingredients later without splattering. Make sure there are no visible strands of egg white in the egg mixture.
4

Add the cream (or yogurt), salt, and pepper to the beaten eggs. If using, add the Dijon mustard now for extra sharpness. Whisk everything together thoroughly until you achieve a smooth, uniform sauce without lumps.

Ingredients: 18% cream, Salt, Ground black pepper, Dijon mustard
Taste the sauce on the tip of a teaspoon and season if necessary. Remember that leftovers may already be salty, so it's better to add less salt at the beginning and possibly adjust the seasoning in the finished dish.
5

Grate the yellow cheese on a coarse grater. Add about 2/3 of the grated cheese to the egg mixture and mix. Set aside the remaining cheese (1/3) - you will sprinkle it on top of the casserole to create a crispy crust.

Ingredients: Yellow cheese (e.g. gouda, cheddar)
Grating the cheese yourself ensures that it melts better and does not contain anti-caking agents that are often added to pre-grated cheese.

Assembling the casserole

6

Prepare a baking dish in which you will bake the casserole (optimal size is about 20x30 cm). Grease the bottom and sides of the dish thoroughly with butter or oil so that the casserole does not stick and can be easily removed.

You can also line the dish with parchment paper, which ensures that nothing sticks and makes cleaning easier. Make sure the paper adheres well to the bottom and sides.
7

In a large bowl (it can be the one you used to prepare the egg mixture, if it's big enough), place all your leftovers: the carbohydrate base (e.g., sliced potatoes), the protein base (e.g., shredded chicken), and vegetables. Add the sautéed onion with garlic. Gently mix everything with a large spoon.

Ingredients: Carbohydrate base from leftovers, Protein base from leftovers, Vegetable broth from scraps
Try to cut the ingredients into pieces of similar size (e.g. 2-3 cm), so that the casserole will have a uniform texture and will be easier to slice.
8

Pour the combined leftovers with the previously prepared egg and cheese mixture. Using a large spoon or spatula, gently but thoroughly mix everything so that the sauce reaches every nook and cranny and evenly coats all the ingredients.

Do not mix too vigorously to avoid crushing delicate ingredients like cooked potatoes or pasta. The goal is for the sauce to combine everything into a cohesive whole.
9

Transfer the entire mixture to the prepared baking dish. Spread it evenly using a spoon or spatula, gently pressing down to fill the entire dish and create a flat surface.

A level surface will ensure that the casserole bakes evenly, and the cheese on top will brown nicely across the entire surface.

Baking

10

Preheat the oven to 180°C with the top and bottom heating function on (without convection). Remember to place the dish in the already preheated oven – this is crucial for the right texture.

Most ovens need 10-15 minutes to reach the set temperature. They usually signal this by turning off the indicator light.
11

Evenly sprinkle the reserved grated cheese over the top of the casserole. Place the dish in the preheated oven and bake for about 30-35 minutes. The casserole is ready when the egg mixture is completely set (check by inserting a stick in the center - it should come out dry), and the cheese on top is melted and beautifully golden brown.

Ingredients: Yellow cheese (e.g. gouda, cheddar)
Baking time may vary depending on the oven and the depth of the dish. Watch the casserole after 25 minutes. If the cheese browns too quickly, you can cover the dish with aluminum foil for the last 10 minutes of baking.
12

After removing from the oven, let the casserole rest for at least 10 minutes before slicing. This step is very important because the hot casserole needs to 'rest' for its structure to stabilize. This way, it can be cut into neat portions that won't fall apart.

Use kitchen gloves to take the hot dish out of the oven. Place it on a wooden board or cooling rack, not directly on a cold countertop, to avoid cracking the dish due to thermal shock.
13

Before serving, sprinkle the casserole with freshly chopped chives, if using. This will add freshness and crunch to the dish. Serve warm, either as a standalone dish or with a light salad.

Ingredients: Chives
Chives are best chopped just before serving to retain their aroma and crispness. Kitchen scissors are great for this.

Fun Fact

💡

Zapiekanki, as a way to use leftovers, gained immense popularity in the United States during the Great Depression in the 1930s. They were a symbol of thriftiness and resourcefulness of housewives who could create a nutritious meal from a small amount of ingredients. Today, in an era of increasing awareness about food waste, this idea is making a comeback.

Best for

Tips

🍽️ Serving

Serve the casserole hot, straight from the dish. A simple salad of arugula or butter lettuce with vinaigrette will be the perfect complement, balancing the richness of the dish with its freshness and acidity. It can also be served with a dollop of sour cream or your favorite sauce, such as garlic sauce.

🥡 Storage

The remaining casserole can be stored in the refrigerator, in the same dish (covered with foil) or transferred to an airtight container, for up to 3 days. It can be reheated whole in the oven (160°C for about 15 minutes) or in portions in the microwave. It also tastes great cold.

📸 Ugotowane przez społeczność

Zaloguj się, aby dodać zdjęcie
Dodaj zdjęcie gotowej potrawy

Po zatwierdzeniu przez moderatora otrzymasz 10 punktów doświadczenia.

🍲

Nikt jeszcze nie dodał zdjęcia. Bądź pierwszy!

Comments (0)

Be the first to comment on this recipe!

Add a comment

You might also like

Recipe Categories

Main Dishes
Main Dishes in: Christmas Eve Dinner

Main courses are the heart of every meal - hearty, delicious, and full of nutrients. Meats: beef, pork, poultry, and lamb in various versions. Fish and seafood: baked, fried, grilled, and stewed. Vegetarian dishes: tofu, tempeh, legumes as the main protein. Casseroles: pasta, potato, vegetable wi...

See all recipes in this category

Lunches are the main meal of the day - filling, balanced, and full of flavor. Traditional two-course lunches: soup and a main dish in Polish tradition. Pork chop with potatoes and cabbage - a classic of Polish lunches. Dumplings with meat, cheese, and fruit - hand-formed delicacies. Beef goulash,...

See all recipes in this category

European cuisine is a mosaic of culinary traditions from the Old Continent - from Spain to Scandinavia. Valencian paella and tapas from Spain - sunshine on a plate. Boeuf bourguignon and ratatouille from France - elegance and finesse. Wiener schnitzel and strudel from Austria - Central European c...

See all recipes in this category

Takeaway dishes are a tasty and practical solution for busy people - prepared to eat outside the home. Recipes for lunch boxes that transport well and taste great even cold. Salads in jars, wraps, panini sandwiches, and Japanese-style bento boxes. Dishes that can be reheated in the microwave: cur...

See all recipes in this category
Reklama