Homemade Wheat-Rye Bread with Active Sourdough and Sunflower Seeds

Wegetariańskie Cakes and Bakes Additions Breakfasts 1320 min Medium 4 wyświetleń ~6.87 PLN - (0)
Rate:
(0)
Start Cooking

Description

Discover the magic of baking real bread at home! This recipe for a wheat-rye sourdough loaf is the essence of home baking – it’s healthier, cheaper, and incomparably tastier than store-bought versions. Thanks to the slow fermentation with natural sourdough, the bread gains a deep, slightly tangy flavor, an incredibly aromatic crumb with irregular holes, and a crispy, golden crust. The addition of whole grain rye flour enriches it with valuable nutrients and fiber, while sunflower seeds and flaxseed add a pleasant texture and nutty notes. The process, although time-consuming, is extremely satisfying and allows you to rediscover the taste of real bread. It tastes perfect with just butter, as a base for gourmet sandwiches, or as an addition to hearty soups and salads. This is not just a recipe; it’s an invitation to the world of artisanal baking in your own kitchen.

Ingredients (9)

Servings:
12
  • Active rye sourdough 100 g
  • Bread flour type 750 400 g
  • Whole grain rye flour type 2000 100 g
  • Filtered water 375 ml
  • Sunflower seeds 50 g
  • Flaxseed 30 g
  • 🌿 Przyprawy
  • Sól kamienna niejodowana 2 łyżeczki
  • ✨ Opcjonalne
  • wildflower honey 15 g
  • Rice flour 20 g
💰 Szacowany koszt dania: ~6.87 PLN (0.57 PLN/porcję)

💡 Kliknij na składnik aby oznaczyć jako użyty

Preparation steps

Autolyse - Preliminary Mixing

1

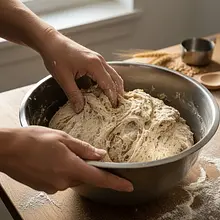
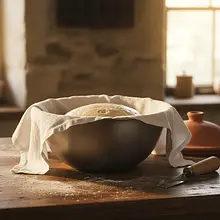
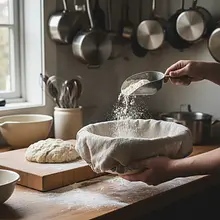
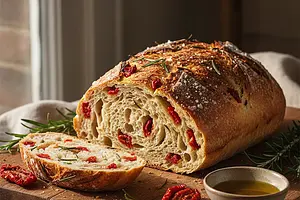
In a large bowl, place both types of flour: 400g of bread flour and 100g of whole grain rye flour. Pour in 350g of water (leave 25g for later). Using a spatula or your hands, mix the ingredients only until all the flour is moistened and there are no dry lumps. Do not knead the dough! Cover the bowl with plastic wrap or a damp cloth and let it rest for 60 minutes at room temperature. This process is called autolyse - it allows the flour to absorb water, which starts gluten development effortlessly and makes the dough more elastic.

Ingredients: 
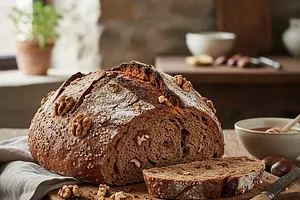
Bread flour type 750, Whole grain rye flour type 2000, Filtered water
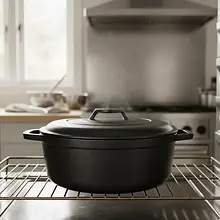
The best choice is a large glass or ceramic bowl with a capacity of about 4-5 liters. Precision is key, so use a kitchen scale to measure all ingredients, including water (1ml of water = 1g).

Adding Sourdough Starter and Salt

2

After 60 minutes of autolyse, the dough should be smoother. Add 100g of active sourdough on top of the dough. Using your fingers, with a pinching motion (the so-called 'pincer method'), incorporate the sourdough into the dough. Then add 10g of salt and the remaining 25g of water. Again, using your hands, knead and gently fold the dough in the bowl for about 5 minutes, until all the ingredients are well combined. The dough will be sticky and tacky - this is normal.

Ingredients: Active rye sourdough, Sól kamienna niejodowana, Filtered water
To check if the sourdough is ready, perform the 'float test': drop a small teaspoon of the sourdough into a glass of water. If it floats on the surface, it is ready to use. Adding water along with salt makes it easier to dissolve and distribute evenly in the dough.

Pre-Fermentation and Folding

3

Cover the bowl and set the dough in a warm place (about 24-26°C) for 4 hours for bulk fermentation. During this time, the dough will rise and gain strength. Instead of traditional kneading, we will be folding it. After the first 30 minutes of fermentation, perform the first fold: wet your hands with water, reach under the dough from one side, gently pull it up and fold it over to the center. Rotate the bowl 90 degrees and repeat the process. Do this a total of 4 times (from each side). Repeat the series of 4 folds every 45 minutes, performing a total of 4 series.

Folding strengthens the gluten network without intense kneading. Wetting your hands will prevent the dough from sticking. After 4 hours, the dough should have increased in volume by about 30-50%, be aerated, and elastic.

Adding Seeds

4

During the last, fourth folding, add the seeds. Sprinkle 50g of sunflower seeds and 30g of flaxseeds on the surface of the dough. Perform the folding as before, trying to distribute the seeds evenly throughout the dough. If you are using honey, add it at this point. After this folding, cover the bowl and let the dough ferment for the last 45-60 minutes.

Ingredients: Sunflower seeds, Flaxseed, wildflower honey
You can lightly toast the sunflower seeds in a dry pan before adding them to the dough to enhance their aroma. Remember to let them cool completely before adding.

Preliminary Shaping and Resting

5

Gently remove the dough from the bowl onto a lightly floured surface. Do not knead it to avoid losing air bubbles. Flatten the dough into a rectangle, then fold its sides towards the center to form a ball. Cover the dough with an inverted bowl and let it rest on the counter for 20-30 minutes. This step (known as 'bench rest') relaxes the gluten and makes the final shaping easier.

Use a dough scraper to easily handle the sticky dough. Try to use as little flour on the countertop as possible - too much can create dry streaks in the finished bread.

Final Shaping and Proofing

6

Prepare a proofing basket (banneton) or a colander lined with a clean kitchen towel. Generously dust it with rice flour. Shape the loaf: flatten the dough ball, fold the top part inwards, then the sides, and finally roll the dough tightly from top to bottom, creating an elongated or round loaf. Seal all the seams well. Place the loaf seam side up in the prepared basket. Cover the basket with plastic wrap or place it in a large plastic bag and put it in the refrigerator for 12-18 hours. This is cold fermentation, which develops the flavor of the bread.

Ingredients: Rice flour
Tight shaping is key to achieving good 'oven spring', which means a strong rise of the bread in the oven. Rice flour is the best because it doesn't stick to the dough.

Baking

7

The next day, at least 45 minutes before baking, place a covered cast iron pot in the oven and preheat it to 250°C. When the oven and pot are hot, carefully remove the pot. Take the dough out of the fridge, flip the basket, and gently transfer the loaf onto a piece of parchment paper. With a sharp knife or razor blade, make one long, deep (about 1 cm) cut on the top. Using the paper, carefully transfer the loaf to the hot pot. Cover with the lid and place in the oven. Bake for 20 minutes.

Use thick kitchen gloves! The cast iron pot is extremely hot. Scoring allows you to control where the bread will crack during baking, creating the characteristic 'ear'.

Baking without a Lid

8

After 20 minutes, carefully remove the lid from the pot. Reduce the oven temperature to 220°C. Continue baking for another 20-25 minutes, until the crust is a deep golden-brown. The bread is ready when it sounds hollow when tapped on the bottom. You can also use a kitchen thermometer - the internal temperature should be 96-98°C.

Baking covered in the first phase creates steam, which allows the bread to rise maximally and forms a crispy crust. Removing the lid allows the crust to brown and dry out.

Cooling

9

Immediately after removing from the oven, carefully transfer the hot loaf from the pot to a metal rack. Leave it to cool completely, which will take at least 2-3 hours. This is a very important step! Slicing hot bread will cause the crumb to become sticky and gummy, as chemical processes are still occurring inside. Patience will be rewarded with the perfect texture.

As the bread cools, it will make characteristic crackling sounds - this is the 'singing of the bread', indicating that the crust is cracking and shrinking, which is a sign of a good bake. The rack allows for air circulation from underneath, preventing the crust from becoming soggy.

Fun Fact

💡

Sourdough bread is one of the oldest forms of bread, with its history dating back to ancient Egypt, around 1500 BC. The long fermentation not only develops flavor but also breaks down some of the phytic acid present in the grains, making it easier to absorb minerals such as iron, zinc, and magnesium.

Best for

Tips

🍽️ Serving

It tastes best when sliced into thick slices. Serve with high-quality butter and flaky sea salt to enhance its flavor. It pairs wonderfully with avocado and poached eggs for breakfast, as well as with ripe cheeses and cold cuts. It can also be dipped in olive oil with added herbs.

🥡 Storage

To keep bread fresh, store it in a linen or cotton bag, or simply wrapped in a kitchen towel, cut side down on a cutting board. Avoid storing it in the fridge, which dries out the crumb. Bread can be frozen – it's best sliced and tightly packed. Individual slices can be thawed directly in the toaster.

📸 Ugotowane przez społeczność

Zaloguj się, aby dodać zdjęcie
Dodaj zdjęcie gotowej potrawy

Po zatwierdzeniu przez moderatora otrzymasz 10 punktów doświadczenia.

🍲

Nikt jeszcze nie dodał zdjęcia. Bądź pierwszy!

Comments (0)

Be the first to comment on this recipe!

Add a comment

You might also like

Recipe Categories

Homemade cakes and pastries are the heart of Polish culinary tradition - sweet memories from childhood. In our collection, you will find recipes for classic yeast cakes, shortcrust, sponge, and cheesecake. Apple pie, poppy seed cake, gingerbread, Easter babka, chocolate cake, and New York cheesec...

See all recipes in this category
Additions
Additions in: Christmas Eve Dinner

Side dishes complement main courses and influence the overall meal experience. In this category, we present recipes for potatoes, grains, rice, dumplings, and salads. Our dishes include classic Polish sides - kopytka, Silesian dumplings, mashed potatoes. You will also find modern alternatives - q...

See all recipes in this category

Breakfast is the most important meal of the day - energy for a good start and a tasty morning. Scrambled eggs, fried eggs, poached eggs, and omelets - protein classics. Oatmeal with fruits, nuts, and honey - a healthy and filling fit breakfast. American pancakes and French crepes - a sweet start ...

See all recipes in this category

Vegan cuisine features delicious dishes without animal products - healthy, ethical, and environmentally friendly. Plant-based protein: tofu, tempeh, soy, lentils, chickpeas, and beans take center stage. Vegan dairy substitutes: plant milks, cashew cheese, and vegan yogurts. Recipes for vegan burg...

See all recipes in this category
Reklama